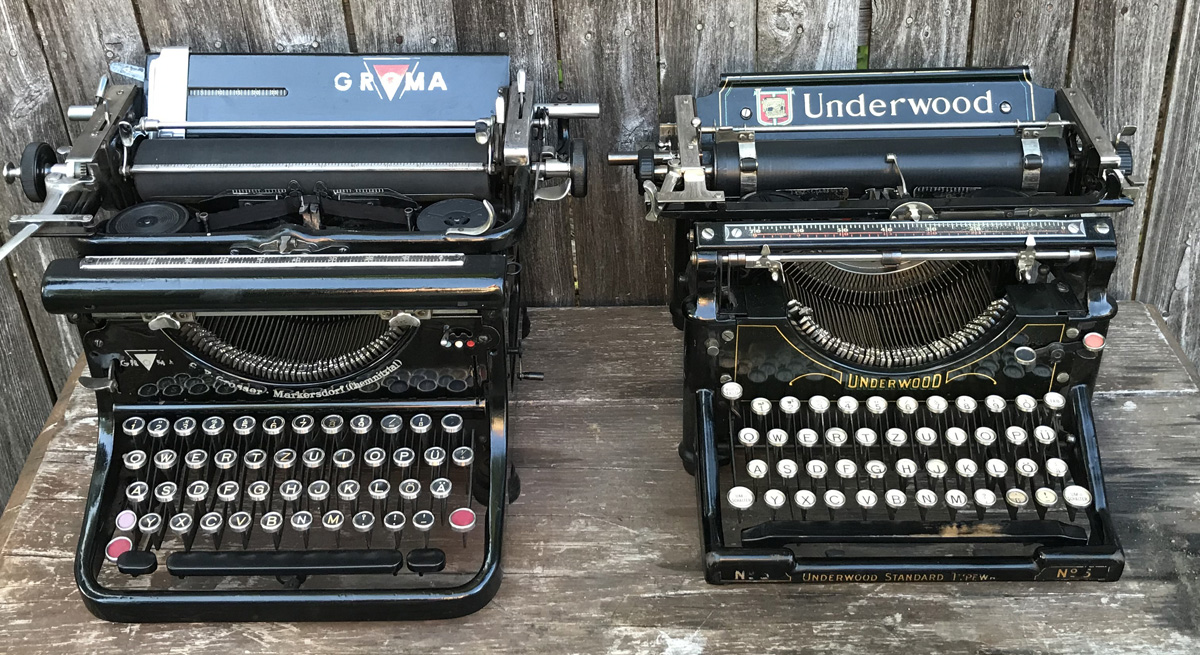
I have been asked many times about how I clean up my typewriters. I’m not any kind of typewriter expert, but I do collect them, and I have found some cleaning methods that work for me, that I am happy to share.
I used to keep all my antique typewriters “as found.” Eventually I realized that this approach was not doing any favors to these machines. If a typewriter has unique historical significance, such as the machine of a famous writer might have, it makes sense to preserve any grime or traces of age and wear. For the vast majority of machines, dirt and rust can only ever be negative. Often, grime and dust are not from the historical period when a machine was used, but are from decades of neglect that came after. I am only a temporary custodian of my typewriters. The best thing I can do for them is to pass them on is as good condition as they can be, in the hopes that a future owner will see that these things were maintained and cared for, and will value them.
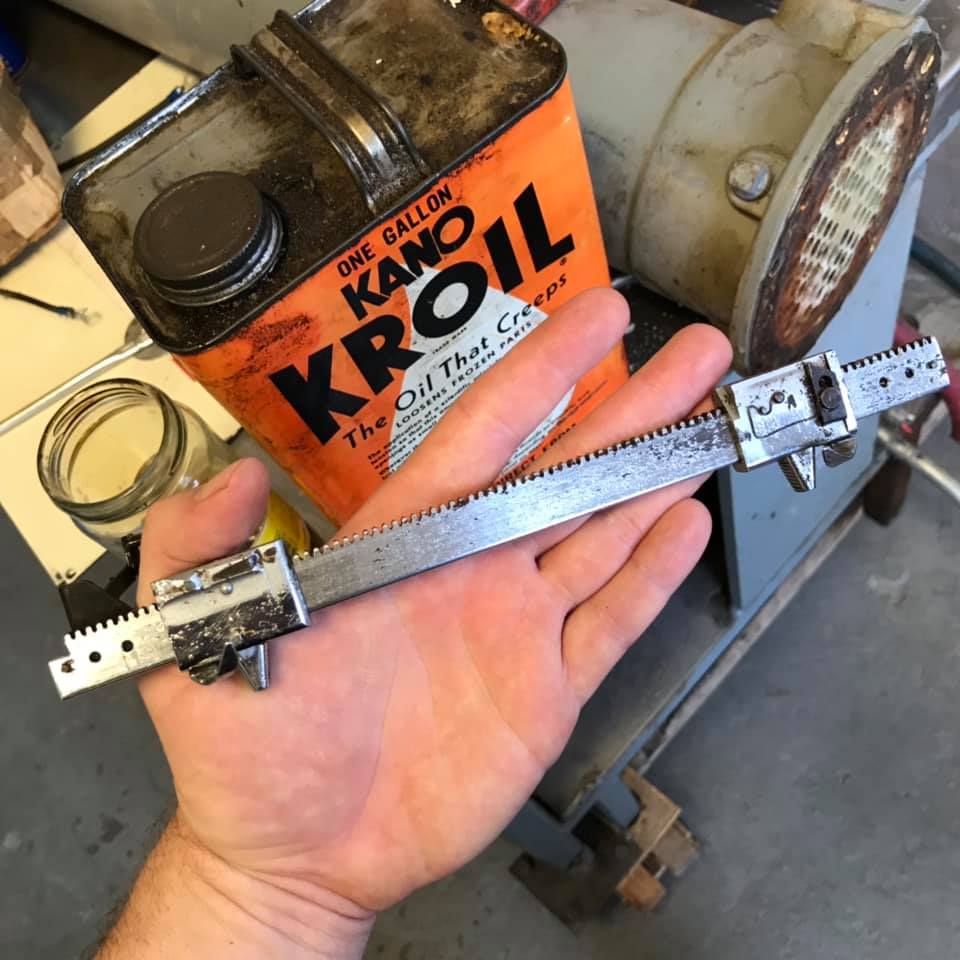
In my initial assessment of a new typewriter, I want to make sure that it basically functions. A common problem is a broken draw band. The draw band is a cord that connects one end of the carriage to a coiled round spring. This keeps constant tension on the carriage and is what makes the carriage advance when a key or the space bar is pressed. After decades of tension, the old cord can simply snap. Fixing this is usually just a matter of winding the spring and fashioning a new cord to connect the carriage to the spring. I usually use heavy duty monofilament fishing line for this. Some typewriters used a thick flat draw band that I will replace with a length of shoe lace.
An old typewriter can have a lot of different problems. All of the keys could be jammed up, or it might skip spaces, some keys may simply not work, it might be impossible to load in a sheet of paper. I am fortunate to have a local typewriter repair shop. If I get a typewriter with a problem I will try to fix it myself by observing carefully as I try to use it, in an attempt to identify the problem. Perhaps the ribbon vibrator or the tabulator mechanism is jammed up. Maybe some linkage has become detached, or some part was bent in shipping. I look closely at the various parts of the machine as I try to make it type. Sometimes, a part will be gummed up by old gummed-up lubricant, or rust, and simply is not moving as it should. A problem like that might be easy to diagnose and fix with something as simple as a droplet of oil. Some problems are more complex and require disassembly of the machine. In cases like that I take the typewriter to the repair shop and have it fixed by a professional.
A typewriter that functions may still have issues. Often, a good cleaning will get such a machine working perfectly again. As I describe my process I will be using the brand names of products I use. Readers outside the US may be able to find equivalent products with different names.
To clean a typewriter you will probably need to take off at least some parts and for that you will need a screwdriver- always a flat head one, for typewriters of this era. Nearly all screwdrivers will have a tapered bit that can mar screw heads. For a typewriter, it is best to use a screwdriver set with various sizes of hollow ground bits. These screwdrivers, often available as gunsmithing screwdriver sets, let you to choose a bit that perfectly fills the groove in the screw head, allowing for maximum turning power without messing up the screw. The bits of these screwdriver sets will also break before they shear off a stuck screw, which is good- a bit is easier to replace than a unique antique screw. Chapman Manufacturing Company makes a “Typewriter Set” of screwdrivers and that is what I use.
With a good screwdriver, you can carefully remove body panels or other parts, to allow you to access the inside of the machine. Kroil is a penetrating oil that I find to be great for loosening any stuck parts, whether it is a screw that doesn’t want to turn or parts fused by rust. The screws on these typewriters are often unique and may be very hard to replace so be extra careful when taking anything apart and stay organized, make sure to keep track of all screws and parts. Carefully clean any parts you remove, don’t leave dust behind. I will gently, carefully used compressed air to blow dust out of a machine. You don’t want to dislodge any springs or to blast off any flaking paint.
The segment is a comb-like metal piece with narrow slots where the type bars move up and down as you type. Dried old lubricant or built-up grime or dust in the segment is a primary cause of sticky keys, perhaps the most common issue with these old machines. I spray PB B’laster into the segment. This is a pressurized solvent that will loosed old gummed up and sticky lubricant. It has a strong smell which I don’t mind. Before spraying this into a typewriter, I use foil to mask off the key tops as well as painted and rubber parts; PB B’laster can damage some paint. I use a lot of cotton swabs and paper towels when I am cleaning a machine. Wipe off any PB B’laster that remains after this step.
Some people will assert that typewriters should not be oiled. For me, a bit of oil, used sparingly is crucial when I am cleaning up a machine. I use Singer sewing machine oil which is nice and light. A tiny droplet applied with the tip of a needle can get gummed-up parts going again. I always wipe off any excess oil. Don’t put oil in the segment.
A trick I learned from my typewriter repairman is to make a mixture of 10 parts odorless mineral spirits and 1 part sewing machine oil. This can be applied with a brush and can remove old lubricant, grime and corrosion. The small amount of oil left behind after the solvent evaporates leaves a thin film that can lubricate and protect.
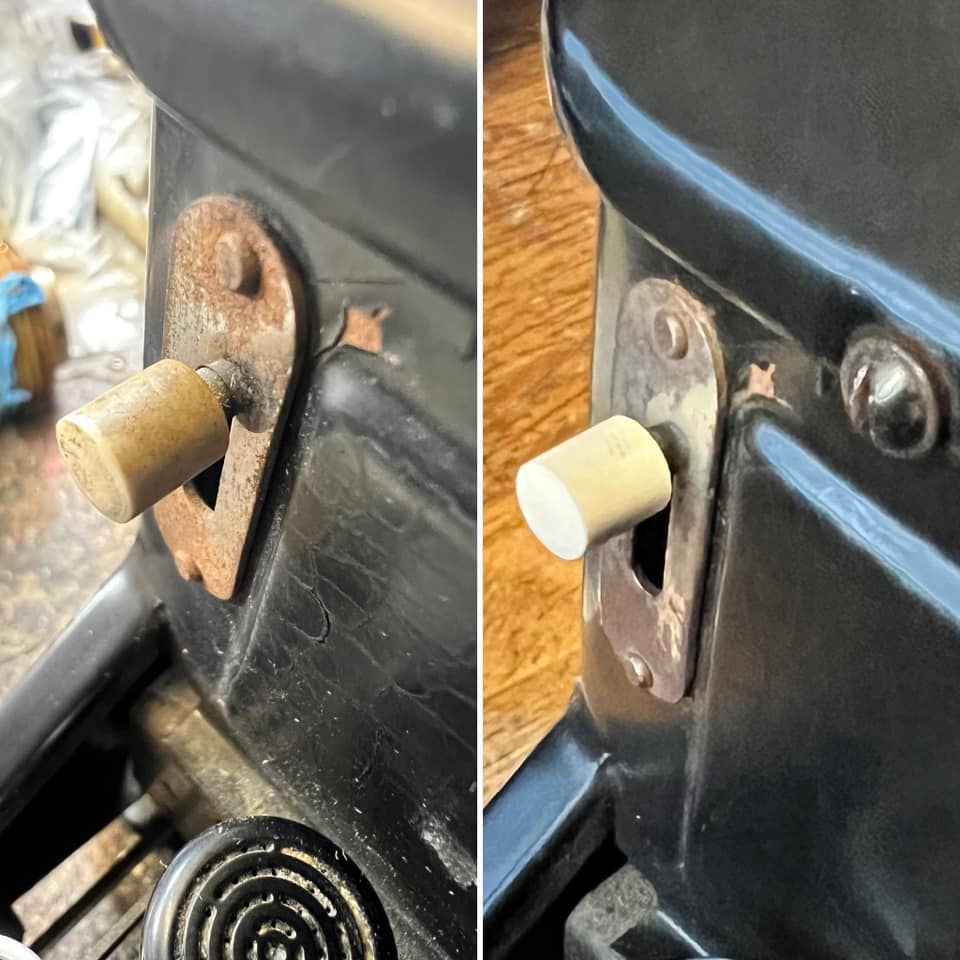
Bare metal parts can be cleaned with #0000 steel wool and sewing machine oil. I always wipe everything dry after cleaning. I polish plated metal parts with metal polish, I use Mothers Mag & Aluminum Polish. For parts with heavy patina and rust I will use a brass bristle brush attachment on a rotary tool. This “Dremelization” can leave behind a brushed look that may not be ideal, but that is almost always better than being crusted with rust.
For painted metal surfaces, I first get them as clean as I can by using very hot water with a little Dawn dish detergent mixed in. This can strip off old grime and nicotine residue. Once I get down to a clean surface I will then buff with paper towels and some sewing machine oil. Be extremely careful around decals as they are fragile. Keep adhesive tape and chemicals like alcohol or ammonia away from decals. A glass cleaner like Windex can strip the ink from a decal in seconds. I have never seen sewing machine oil cause issues with any paint or decals but I am always extra careful with any decaled surface. It is incredible how some gentle buffing with sewing machine oil can restore a high gloss to an old black lacquered finish.
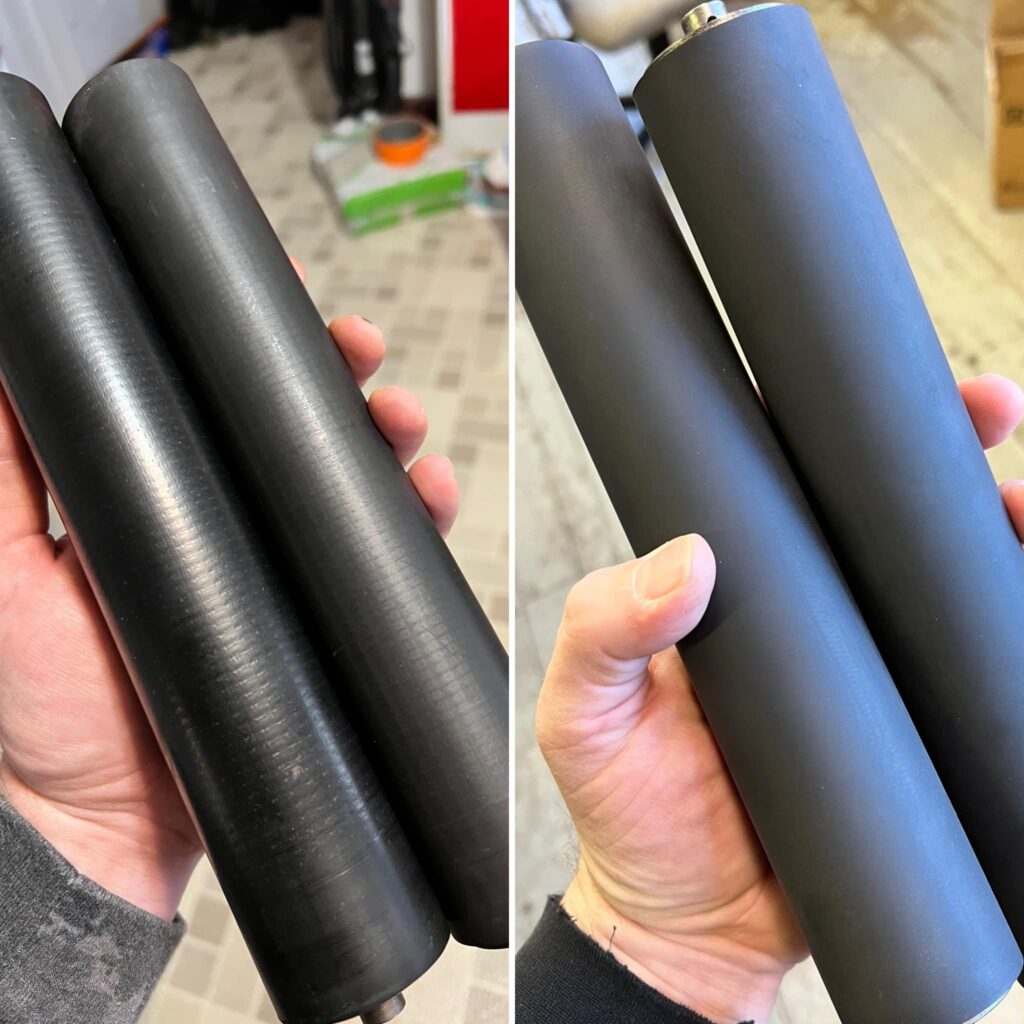
The large roller that the paper winds around in the carriage, is the platen. This platen is made from metal (or sometimes wood on very old machines) that is covered with rubber. Over time, the rubber coating hardens. Some old typewriters will be found with soft platens. Other times the platen rubber can be as hard as glass. If a platen is glossy and pitted, it will be very hard. You can try gently pressing a thumbnail into the edge of a platen to test it. A soft platen will have just a little give. A hard platen can be as unyielding as an iron pipe. The hardness of the platen will have an impact on the experience of using a typewriter. If the platen is fossilized, cracked or pitted, I will remove it and send it to JJ Short, a company that can remove the old rubber and replace it with new rubber in the original style. Removing a platen can be very simple on some models, very complicated with others. For tough jobs, I have the local typewriter repair shop do this work. If the platen still has some life left in it, I will wipe it down with a product called Rubber Renue. In my experience this product cannot make a hard platen soft again, but it can clean and slightly revitalize the surface and perhaps make it a little bit grippy again. If a platen is hard you should use two sheets of paper when typing.
Keytops can be carefully cleaned with glass cleaner and cotton swabs. Never flood the surface of glass keytops with liquid as the cleaner can seep down under the glass and discolor the paper key legends.
The type slugs are the parts with characters that impact the paper when typing. For optimum print quality, the type slugs must be clean. I will lift them all up and put some layers of paper towel underneath them, then scrub them with a brass brush and some rubbing alcohol. You can mask off painted or rubber parts with foil to prevent the alcohol from splashing on them. More detailed cleaning of the type slugs can be done with the tip of a needle. Pay attention to the insides of letters, especially inside little circles as in “o”, “a”, “d”, “b” etc. as old ink and grime builds up and can clog these.
Portable typewriters are often found with their original cases. It is common to find a machine in excellent condition, that was protected for decades in a case that now looks shabby on the outside. Case exteriors are easy to clean up. Metal bits can be cleaned with the same tools used for typewriter parts: metal polish, steel wool, Dremel with a brass brush. I use black shoe polish to fill in and even out any scratches or areas of worn leathercloth covering. I will glue down any peeling leathercloth. A final step is buffing with sewing machine oil, which revitalizes the old covering.
A lot of cleaning is really just common sense and attention to detail. At a minimum, you want every part that you touch when typing to be clean.
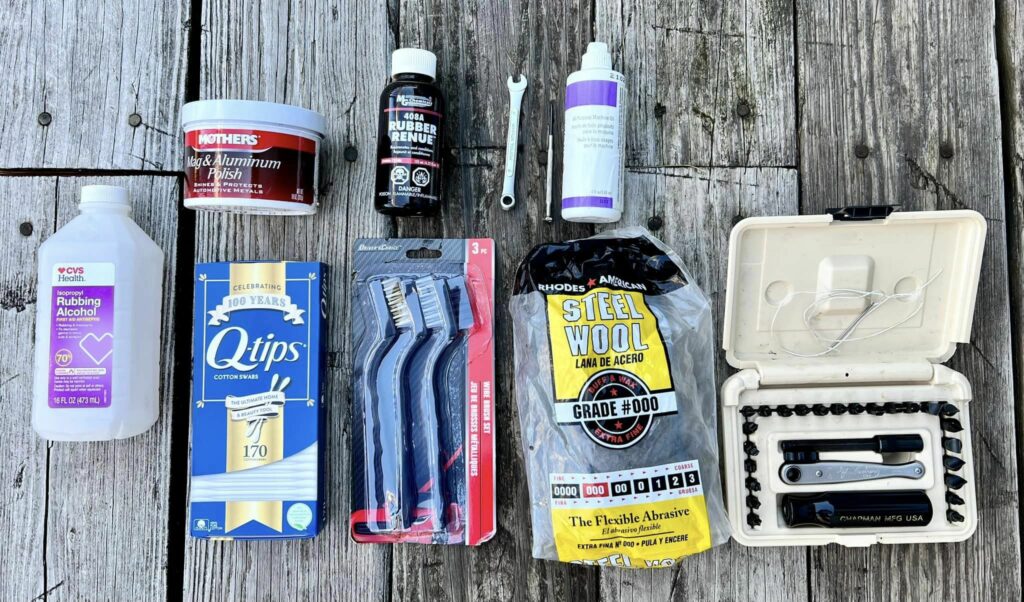
The photo below illustrates a kit I put together to work on one typewriter on a long weekend away from home. The rubbing alcohol and bristle brushes are for cleaning the typeface. The metal polish and steel wool are for cleaning up metal. At lower right is my indispensable screwdriver set. The tiny screwdriver and small wrench are for adjustments. Small bottles contain sewing machine oil and Rubber Renue. Not shown: a roll of paper towels.
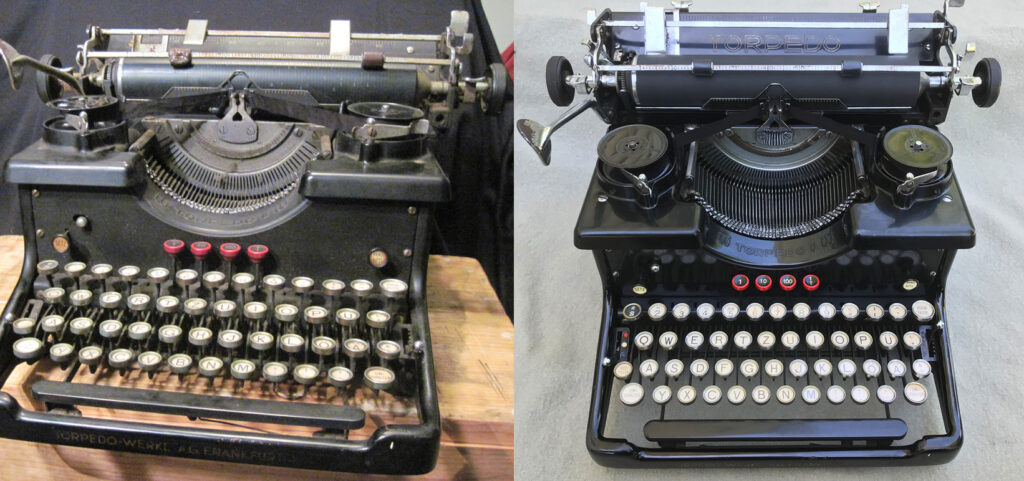
Typewriters were built to last. It can be incredible how they will transform from dusty relics to usable machines with a thorough cleaning. To see an example of this, take a look at the 1935 Torpedo 6 I cleaned and restored.
A final step for me in any typewriter cleaning is a fresh ribbon. Almost all 1930s-40s German typewriters use the same standard size ribbon, just with different spools. I wind new ribbon on the old ribbon spools. They always type best with a fresh ribbon, for me.